In summary:
- Never train a dog under 14-18 months at full jump height to protect vulnerable growth plates.
- Calculate jump height based on the dog’s withers (shoulder) height, adhering to AAC guidelines.
- Prioritize quality over quantity; avoid excessive repetition to prevent cumulative microtrauma.
- Implement a structured dynamic warm-up before every session and a cool-down after.
- Time nutrition carefully, feeding a recovery meal within the 30-60 minute post-exercise metabolic window.
As a sports medicine veterinarian, I see countless agility competitors who are deeply dedicated to their canine partners. You invest time, energy, and heart into this sport. Yet, a common fear underlies it all: are we inadvertently harming the very dogs we adore? The passion for a perfect run can sometimes overshadow the principles of long-term orthopedic health. Many handlers follow the basic rules—waiting until a dog is “mature” or sticking to prescribed jump heights—but they often miss the deeper physiological reasons behind them.
The common advice to “just practice” can be dangerous if misinterpreted. The real threat to your dog’s longevity isn’t a single bad jump; it’s the slow, silent accumulation of stress on joints, ligaments, and cartilage. This is what I call cumulative microtrauma. It stems from improper warm-ups, excessive repetition, poor nutrition, and training that begins before a dog’s body is truly ready.
But what if we could shift our focus from simply following rules to making informed, proactive decisions about our dog’s physical well-being? The key is not to train less, but to train smarter. It requires understanding the biomechanics of a jump, the metabolic needs of a canine athlete, and the profound impact of our choices on their orthopedic integrity.
This guide moves beyond the rulebook. We will explore a sports medicine approach to building a resilient, healthy, and happy agility partner. We’ll delve into the science of growth plates, proper training structure, and the critical roles of conditioning and nutrition, with special considerations for the unique challenges faced by competitors here in Canada.
This comprehensive overview will equip you with the knowledge to protect your dog’s joints and ensure a long, joyful career in the sport you both love. The following sections break down the key pillars of a safe and effective training program.
Summary: A Veterinarian’s Guide to Safe Agility Jump Training
- Why Must You Wait Until 14 Months for Full Height Jumps?
- How to Calculate the Safe Jump Height Based on Shoulder Measurement?
- Jump Grids or Full Courses: Which Builds Better Form?
- The Repetition Danger: Why Drilling the Same Jump 20 Times is Bad
- When to Stretch: The Warm-Up Routine Every Sport Dog Needs
- Why Does “Power Feeding” Puppies Destroy Their Joints Long-Term?
- When to Feed Your Agility Dog: The Window for Muscle Recovery
- How to Build Safe DIY Weave Poles for Backyard Exercise?
Why Must You Wait Until 14 Months for Full Height Jumps?
The single most important rule in preserving a sport dog’s long-term health is patience. The insistence on waiting until a dog is at least 14 to 18 months old for full-height jumping isn’t arbitrary; it’s based on the critical process of skeletal maturation. In young dogs, the ends of long bones are equipped with soft cartilage areas called epiphyseal plates, or growth plates. These plates are responsible for bone growth and are the weakest part of a puppy’s skeleton, even weaker than the surrounding ligaments and tendons.
A forceful impact from landing a jump, or the concussive force of repetitive jumping, can damage these delicate plates. This can lead to improper healing, causing bones to stop growing or to grow unevenly, resulting in permanent limb deformities and a predisposition to arthritis. While many growth plates close around 12 months for smaller breeds, large and giant breeds can take between 14 to 24 months for all plates to fully ossify (turn into hard bone). According to veterinary consensus, the minimum age for official agility is 18 months, but for giant breeds, waiting until 24 months is far safer.
This doesn’t mean a young dog can do nothing. Foundation work is crucial. Focus on safe proprioceptive and body awareness exercises. Especially during long Canadian winters, indoor facilities provide controlled environments for this training. Safe activities include:
- Cavaletti work with poles flat on the ground.
- Balance disc or wobble board exercises to build core strength.
- Slow, controlled walks on varied surfaces to improve body awareness.
- Adhering to the “five minutes of structured exercise per month of age” rule to avoid over-exertion.
By respecting your dog’s biological timeline, you are not delaying their career; you are investing in its length and quality, setting the foundation for years of pain-free performance.
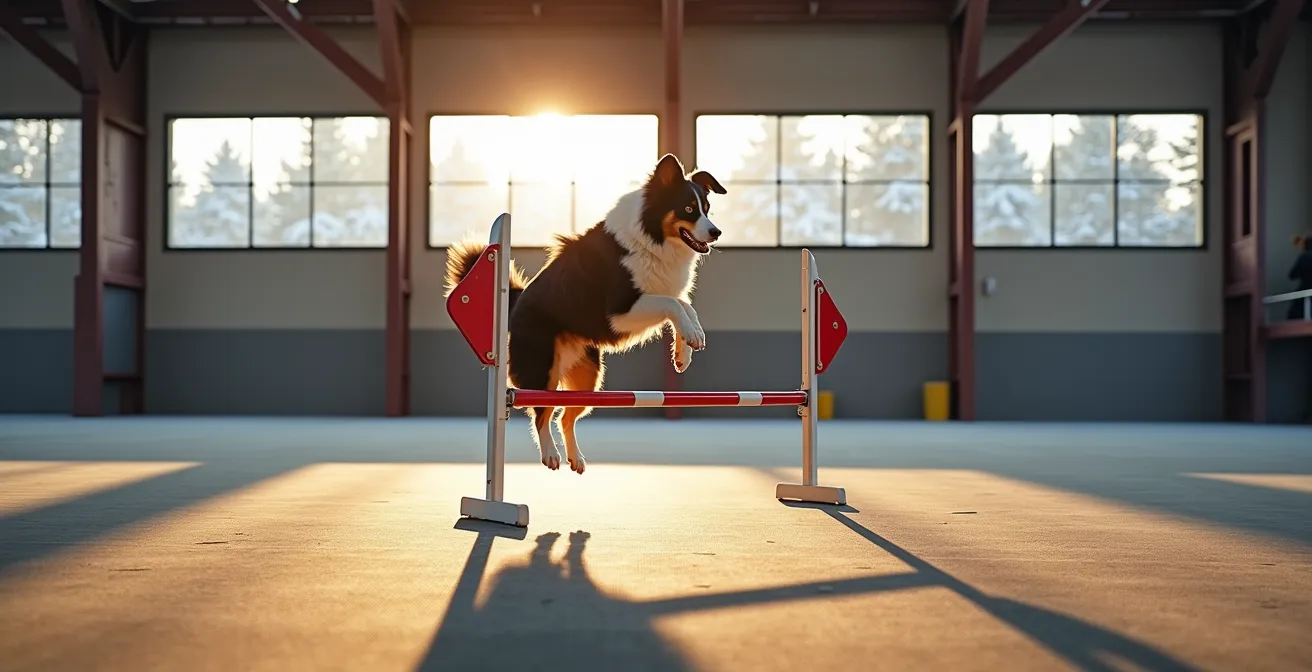
How to Calculate the Safe Jump Height Based on Shoulder Measurement?
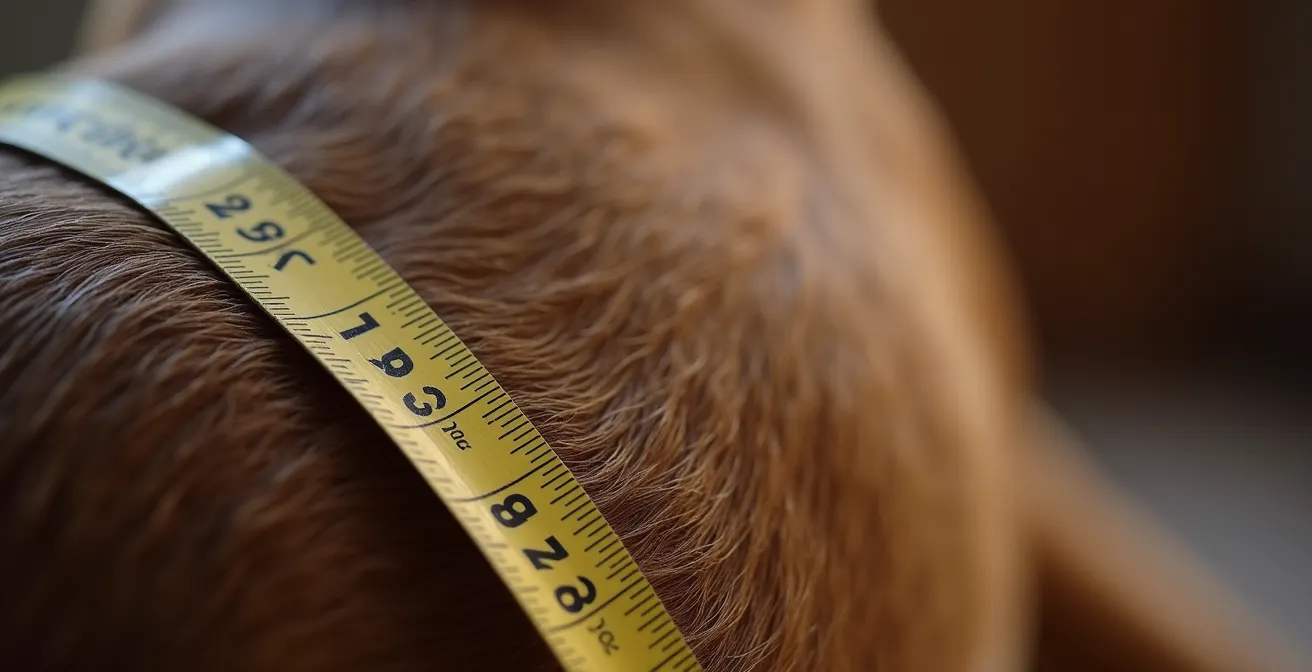
Once your dog is skeletally mature, setting the correct jump height is the next critical step in safeguarding their orthopedic integrity. The universal standard for determining jump height is the dog’s height at the withers—the highest point of the shoulder blades. This measurement provides a consistent baseline, regardless of a dog’s build or leg length. To measure accurately, have your dog stand squarely on a flat surface and use a rigid measuring stick or a wicket to find the height from the floor to the top of their shoulder blades.
This section’s illustration provides a clear visual guide on locating the correct measurement point at the withers, which is essential for accuracy.
In Canada, the Agility Association of Canada (AAC) sets the standards for competition. These heights are designed to challenge the dog without creating excessive strain. Adhering to these official guidelines, even in practice, is a fundamental safety measure. Training at heights significantly above your dog’s official category offers no benefit and dramatically increases the risk of injury from both impact and repetitive strain. Remember, the goal is an efficient, clean jump, not a maximum-effort leap.
The following table outlines the current jump height standards set by the AAC, which should be the basis for all your training setups. Note that adjustments are often made for specific surface conditions, a critical factor in many Canadian indoor and outdoor venues.
| Organization | Dog Height at Withers | Jump Height | Surface Adjustment |
|---|---|---|---|
| AAC (Agility Association of Canada) | Under 12 inches | 8 inches | -2 inches on wet grass |
| AAC | 12-16 inches | 12 inches | -2 inches on wet grass |
| AAC | 16-21 inches | 16 inches | -2 inches on wet grass |
| AAC | Over 21 inches | 20-24 inches | -4 inches on artificial turf |
Always err on the side of caution. If your dog is returning from an injury, is a senior, or is just having an “off” day, there is no shame in lowering the bars. Smart training prioritizes the dog’s well-being over ego.
Jump Grids or Full Courses: Which Builds Better Form?
A common debate among handlers is whether to focus on isolated jump grids or practice full-length courses. From a sports medicine perspective, the answer is not one or the other, but a strategic combination of both. Each serves a distinct purpose in developing a biomechanically efficient and safe jumper. Biomechanical efficiency is about teaching the dog to navigate an obstacle with the least amount of physical stress and wasted energy, which directly translates to a lower risk of injury.
Jump grids are the foundation. These are short, controlled sequences of jumps designed to teach a specific skill: collection (shortening the stride), extension (lengthening the stride), slicing a jump at an angle, or developing a consistent jumping arc. By isolating the jumping skill from handling cues, grids allow the dog to focus on their own body and find the most efficient way to clear the bars. This is where muscle memory for good form is built. Tools like the “Progressive Jump Circle” are excellent examples of structured gridwork that can significantly improve a dog’s jumping mechanics.
However, dogs do not compete in grids. Full courses introduce the element of handling, flow, and stamina. The problem is that running a full course can mask underlying form issues. A handler might compensate for a dog’s poor jumping form with a handling cue, never addressing the root problem. A more effective approach, especially for handlers in Canadian provinces like Ontario, Quebec, and British Columbia who rely on smaller indoor training spaces during winter, is the use of “sequence segments.” These are mini-courses of 2-4 obstacles that bridge the gap between isolated gridwork and a full run. They allow you to work on specific handling moves in the context of jumping, without the physical toll of a 20-obstacle course.
Ultimately, grids build the technique, and short sequences integrate that technique with your handling. Full courses should then be used more sparingly to test and confirm the skills that have been carefully built in these smaller, more focused sessions.
The Repetition Danger: Why Drilling the Same Jump 20 Times is Bad
The old adage “practice makes perfect” can be a dangerous trap in dog agility. While repetition is necessary to learn, mindless repetition is one of the fastest routes to injury. The primary danger lies in cumulative microtrauma, the gradual damage to soft tissues like ligaments, tendons, and cartilage from repeated stress. Your dog might not show lameness after one session, but the damage is accumulating. Studies on agility-related injuries are alarming, indicating that injuries affect between 32% to 41.7% of agility dogs, with a significant portion being soft-tissue injuries linked to repetitive strain.
Drilling the same jump or sequence 20 times in a row is detrimental for several reasons. First, physical fatigue leads to a breakdown in form. As the dog tires, they are more likely to land awkwardly, hit the bar, or strain a muscle to compensate. Second, mental fatigue sets in. A bored or frustrated dog is an unfocused dog, which increases the likelihood of an accident. The goal of training should be quality over quantity—a few perfect, thoughtful repetitions are far more valuable than dozens of sloppy ones.
To combat this, many successful trainers and veterinary sports specialists advocate for a “3-Rep Rule.” This protocol emphasizes short, focused, and positive training bursts, which is especially effective for productive training sessions during the short Canadian winter days.
Action Plan: The 3-Rep Rule for Quality Training
- Maximum 3 Successes: Perform a specific skill or sequence for a maximum of three successful repetitions in a row. After the third success, stop and reward.
- Change the Picture: After a set of three, change the exercise. Alter the jump height, change the angle of approach, or move to a different skill entirely.
- Incorporate Breaks: Provide a 3-5 minute break for rest and mental decompression between each short series. Use this time for connection, not just waiting.
- Monitor for Burnout: Watch for signs of mental fatigue (sniffing, leaving the sequence) or poor form (ticking bars, flat jumping arc). End the session on a positive note before these signs appear.
- Focus on Quality: Your goal is three high-quality, enthusiastic repetitions, not just getting through them. This mindset shift is crucial for injury prevention.
Remember, your dog’s physical and mental capital is finite. Spend it wisely in training to ensure you have plenty left for a long and successful career in the trial ring.
When to Stretch: The Warm-Up Routine Every Sport Dog Needs
Entering an agility ring without a proper warm-up is like a human athlete sprinting without stretching first—it’s an open invitation to injury. Cold muscles, tendons, and ligaments are less pliable and more susceptible to tears and strains. A warm-up does more than just “warm” the muscles; it increases blood flow, lubricates the joints, and primes the neuromuscular system for the explosive movements required in agility. It is an non-negotiable part of every single training session and trial run.
Simply walking from the car to the ring is not a sufficient warm-up. A proper routine should involve 5-10 minutes of active, dynamic stretching. This means controlled movements that take the joints and muscles through their full range of motion, as opposed to static stretching (holding a stretch), which is better reserved for a cool-down. For Canadian handlers, the warm-up process faces unique challenges. The “car to ring” routine is critical in cold weather. Moving a dog from a heated vehicle directly into a cooler trial building can shock their system. A 2-3 minute brisk walk in the parking area (if safe) allows for gradual temperature adjustment before beginning the dynamic warm-up indoors.
A simple yet effective 5-minute pre-agility warm-up protocol should include a variety of movements to prepare the entire body:
- Spinal Flexibility: Gentle spinal twists (luring the dog’s head to their hip on each side) and repeated play bows to a standing position.
- Shoulder & Hip Engagement: Side-stepping or “grapevines” in both directions, and figure-eights around your legs.
- Low-Intensity Trotting & Sprinting: Several short bursts of trotting and a few recalls at about 50% of their top speed to elevate heart rate.
- Low Hurdle Work: Stepping over a few jump bars placed flat on the ground to activate the muscles used for jumping without any impact.
Equally important is a cool-down, which involves 5-10 minutes of walking to allow the heart rate to return to normal gradually. This helps flush lactic acid from the muscles, reducing post-exercise soreness and improving recovery.
Why Does “Power Feeding” Puppies Destroy Their Joints Long-Term?
The desire to see a puppy grow up big and strong is natural, but the practice of “power feeding”—providing high-calorie diets or encouraging rapid growth—is one of the most damaging things you can do to a future canine athlete. This is especially true for medium to large-breed dogs, where skeletal development is a slow and carefully orchestrated process. As we’ve discussed, in large breeds, growth plates can remain open until 14-16 months of age, and sometimes longer. Rapid growth puts excessive mechanical stress on these vulnerable structures.
The problem is both mechanical and nutritional. When a puppy gains weight faster than their skeleton can mature to support it, the immense pressure on the soft growth plates and developing joints can lead to malformations. However, the nutritional aspect is even more sinister. Research shows that excess calcium and calories in large-breed puppy diets are a direct cause of several developmental orthopedic diseases. These conditions occur when accelerated growth disrupts the delicate hormonal and mechanical signals that control bone formation.
Two common examples of these diseases are:
- Panosteitis: Often called “growing pains,” this is an inflammation of the long bones that causes shifting leg lameness. It’s frequently linked to high-protein, high-calorie diets.
- Hypertrophic Osteodystrophy (HOD): A more severe condition involving inflammation at the growth plates, leading to fever, severe pain, swelling in the joints, and a reluctance to move. It is strongly associated with nutritional excess.
The goal for any future sport dog should be slow, steady growth. This is achieved by feeding a high-quality, large-breed puppy food that is specifically formulated with controlled levels of calcium and phosphorus. Do not free-feed; provide measured meals and monitor your puppy’s body condition score closely. They should have a visible waist and you should be able to feel their ribs easily. A lean puppy is a healthy puppy with a much brighter orthopedic future.
Resist the urge to have the biggest puppy on the block. By promoting a lean body condition, you are giving their joints the best possible chance for a long, sound, and successful career.
When to Feed Your Agility Dog: The Window for Muscle Recovery
Nutrition for a canine athlete isn’t just about *what* you feed, but also *when* you feed it. Strategic nutrient timing can significantly enhance recovery, rebuild muscle, and reduce the risk of life-threatening conditions like Gastric Dilatation-Volvulus (GDV), or bloat. The two most critical periods to manage are pre- and post-exercise.
Feeding a large meal right before strenuous activity is extremely dangerous. A full stomach is heavy and can move more freely within the abdominal cavity, increasing the risk of GDV, where the stomach twists on itself. This is a dire medical emergency. As a strict rule, you should avoid feeding any heavy meals within 2-3 hours before a training session or trial run. Allowing the stomach to be relatively empty during exercise is a key preventative measure, especially for deep-chested breeds like Boxers, Great Danes, and German Shepherds.
After exercise, however, the body enters a crucial recovery phase. There is a “metabolic window” during which the muscles are primed to absorb nutrients to repair micro-damage and replenish energy stores (glycogen). Studies in canine athletes show that the golden window for optimal glycogen and protein synthesis is 30-60 minutes post-exercise. Providing a small, easily digestible recovery meal or snack within this window can dramatically speed up recovery and reduce muscle soreness. This doesn’t have to be a full meal; it could be a specialized recovery drink, a small portion of wet food mixed with water, or a high-protein snack.
For deep-chested breeds, it is still wise to wait at least an hour after activity before feeding their main, larger meal. The small recovery snack in the 30-60 minute window strikes a balance between rapid recovery and GDV prevention. Consider a complete feeding timeline:
- No large meals 2-3 hours before exercise.
- Provide a small recovery snack/drink within 30-60 minutes after exercise.
- Wait at least 1 hour after exercise before feeding their main meal.
- Supplement with joint support like glucosamine and chondroitin, and consider Canadian-made performance foods rich in anti-inflammatory omega-3 fatty acids.
By timing your dog’s nutrition strategically, you are actively helping their body recover faster, build stronger muscle, and remain resilient for the next challenge.
Key takeaways
- Longevity over speed: Prioritizing a dog’s orthopedic health through smart, science-backed training is the true measure of success in agility.
- Training is a holistic system: Safe jumping is not just about the jump itself, but an interconnected system of age-appropriate exercise, proper nutrition, structured warm-ups, and mindful repetition.
- The handler is the first line of defense: By understanding the ‘why’ behind the rules, you become a proactive guardian of your dog’s well-being, not just a trainer.
How to Build Safe DIY Weave Poles for Backyard Exercise?
Backyard training can be an excellent way to supplement formal classes, but creating your own equipment requires an unwavering commitment to safety. This is especially true for weave poles, which involve rapid, repetitive flexion and extension of the spine. An improperly constructed set can teach poor form or, worse, cause injury. The two most critical safety factors are pole spacing and surface stability, particularly with the challenging ground conditions found in many Canadian backyards.
The spacing of the poles is non-negotiable. According to official regulations, the Agility Association of Canada requires exact pole spacing of 24 inches center-to-center. This specific distance is designed to allow for a smooth, rhythmic, and safe motion through the poles. Using a different spacing, even by a small margin, forces the dog into an unnatural stride, placing undue stress on their spine and shoulders. When building your set, measure meticulously.
The material and base are also crucial. For the poles themselves, 1-inch furniture-grade PVC is a superior choice. It is more weather-resistant to Canadian climate extremes than standard plumbing PVC and its glossy outer coating resists UV degradation better, preventing it from becoming brittle. The base must be heavy and stable enough that it won’t tip over if a dog hits a pole. For backyard use, a flat base is safer than one with “feet” that could trip a dog. Furthermore, you must consider the training surface. Practicing on frozen, uneven winter ground or slick, wet grass poses a high risk for shoulder and toe injuries. Always use your DIY equipment on a flat, non-slip surface. If your yard is not suitable, it’s better not to practice than to risk injury.
Building your own equipment can be rewarding, but only if safety is the primary blueprint. A cheap, hastily made set of weaves isn’t a bargain; it’s a liability that could compromise the very athletic career you’re trying to build.